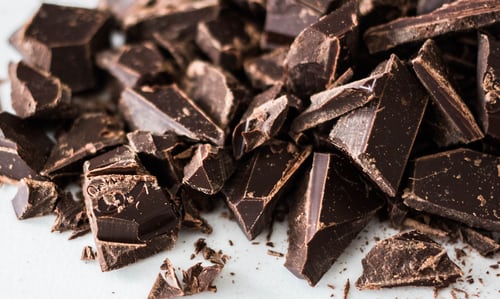
Chocolate Photography Tips and Techniques
The photography world has seen many a chocolate photoshoot take place in the last few years but there are still new techniques that are yet to be seen! Here are our top tips on how to make the perfect chocolate shoot!
Be prepared: Always make sure you have the correct equipment for your shoot, whether this is a specific camera, lenses, lighting equipment, and props. You never know when the weather is going to turn and you want to capture the moment!
Try to get out of your comfort zone: There is nothing wrong with being comfortable with a camera, and we love to see the wonderful pictures taken on a smartphone. However, you can really get creative if you are willing to step out of your comfort zone and use different equipment or techniques.
Think about your setting: What is the best environment for your shoot? Where will you be? What is the lighting like? What is the best angle for the shot? The sky, trees, and any other natural elements can really add a certain element to the photo. Think about these things before you begin your shoot.
Get the chocolate: You need to make sure you have the right chocolate for the job! Have you got the perfect chocolate cake? The best dark chocolate? The ideal milk chocolate? The perfect flavour? Whatever it is, make sure you have it. It will make or break the end product.
Lighting: If you have the right light, then your picture will shine. Always be on the lookout for good light – a bright sun, a full moon, a bright street lamp – whatever works best for you!
Camera settings: Your camera settings are just as important as your chocolate. If your camera does not have the right settings, then the pictures will not look good. Always ensure you have the right settings for the light and your chocolate. If you don’t, then you are not going to achieve the best result.
Remember the rule of thirds: One of the most important things when taking photos of chocolate is to make sure that the subject is divided by a third. The main subject should be placed in one of the thirds. This gives the viewer a great deal of space to focus on.
Chocolate can be used in many different ways, so experiment and come up with some different ideas.
Use an exposure meter.
Use a timer to control the shutter speed. This should be set to 1/30th of a second (for example, on a Nikon D3S) and you should take two pictures (one on a fast speed and one on a slow speed). You can then use software to make the photos appear to have been taken at the slower speed.
Make sure your chocolate is completely smooth.
Chocolates usually have tiny air pockets inside them, so you need to gently blow them out. Then, the surface needs to be smooth and polished. To ensure this, cover the chocolate with plastic wrap and gently press down to flatten it out.
Consider a dark background.
The darker the background the better the chocolate looks. You can achieve this by using a table lamp, or by standing behind a mirror. If you are shooting candies, place a white piece of card behind the candy to increase contrast.
Consider a reflective surface.
If you are using a mirror, you should position it vertically or horizontally. This will add more dimension to your chocolate shots.
Consider a tripod.
It may seem obvious, but a tripod is an absolute must if you are shooting candies or chocolates. This is because the smaller your camera lens is, the more movement it will pick up. A tripod will allow you to hold the camera steady.
Use a lens hood.
This is used to prevent any of the light from hitting the front of the lens. This will cause the image to appear blurry.
Consider framing the shot.
If you have a wide angle lens, you should consider framing your shot. By using a wide angle lens you will have a large canvas to work with.
Use a reflector.
When lighting a subject, it is always best to have more than one light source. This ensures you have enough light for the shot. It also creates depth and helps the chocolate look its best. A reflector is a perfect accessory for capturing a chocolate photo.
Use a diffuser.
A diffuser is a device that is placed in front of a flashgun and works to spread the light evenly. This is helpful when photographing a dessert as it ensures there is more light on your subject.
Consider a white background.
When shooting a chocolate, you want to ensure it is perfectly white. White is the best color to use to capture a chocolate image.
Chocolate Photography Examples and Ideas


